4080 Super in the CLEANEST mATX SFF Case You’ve Never Seen

Watch Video

This build has been highly anticipated all month. It features a liquid-cooled, black and white theme and utilizes the new RTX 4080 Super Founders Edition. This release completes NVIDIA’s lineup of new graphics cards for the month. The RTX 4080 Super is expected to deliver performance comparable to the 4080, but at a $200 lower price point.

Components

Case: COOJ Z-18

I’m using the Z-18 from the company called Cooj. They have some of the cleanest designs I have seen. For starters, you have the outer cover that’s a single piece that slides off from the top, and it’s made of 4mm thick aluminum. Although there’s not a ton of ventilation in this piece, you have some hole punching on the front and rear, but it seems that they’re hoping to get the majority of the fresh air from the top and the bottom. Both those areas have mounts for a couple of 120 mm fans or a 240 mm radiator, so I’m interested to see how that works out for air flow. There’s a built-in cover for the power supply to hide the unit itself and keep the finished build looking tidy, which I think is pretty interesting. There’s also a cage to mount a few hard drives if you need it. For a case that’s on the slightly larger side of SFF, which is typically considered anything under 20 L, this is looking like a promising mATX option as long as you don’t mind spending a little extra on an sfx power supply, but we’ll have to see how thermals look once we get some Hardware installed.

Graphics Card: NVIDIA GeForce RTX 4080 Super

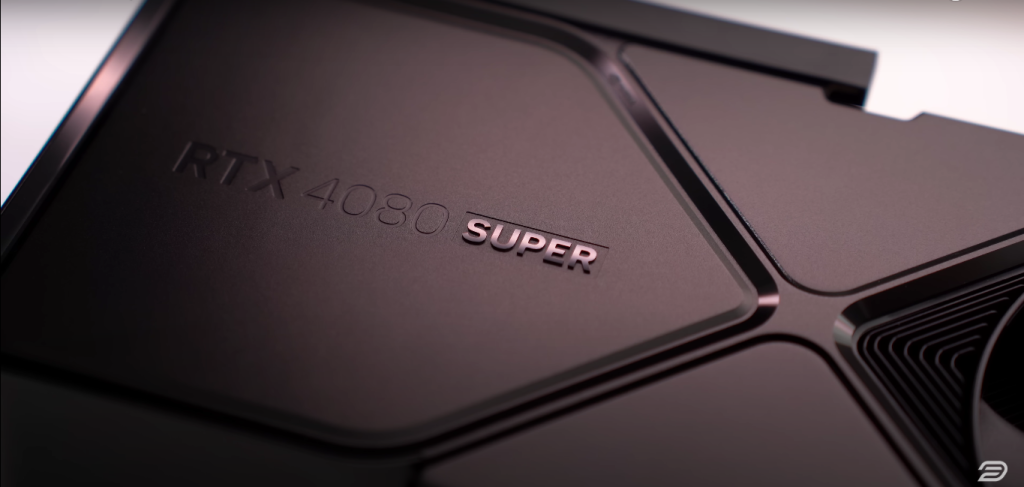
We’re using the new RTX 4080 Super, which is designed to deliver the same performance as the original 4080 but at a $200 lower price. It also has a clean, all-black aesthetic that looks great. Compared to the original 4080, there are slight improvements in core count, clock speeds, and memory bandwidth, but the main difference is the price drop—something many felt was overdue. From my testing on a 14900K test bench, performance gains are modest—around 2 to 5%—which lines up with NVIDIA’s claims. In Forza Horizon 5, I saw about a 2.5% frame rate increase. Compared to the 4070 Ti Super, the 4080 Super offers around a 21% boost, and across multiple games, I’ve seen performance increases in the 15–25% range. Both cards can handle 4K 60fps easily, but the 4080 Super is more comfortable for 4K 120fps gaming.

This card isn’t aimed at current 4080 owners. It’s meant to convince 2000- and 3000-series users to upgrade. Compared to the 3080, the 4080 Super delivers roughly 60% better performance, which is a solid generational leap. Although it doesn’t match the original $700 MSRP of the 3080, that price point was rarely available in practice. With frame generation—AI-generated frames inserted between native ones—you get smoother motion, especially in single-player titles like Alan Wake 2. While it’s not ideal for competitive shooters due to added latency, in high-fidelity games, the latency is minimal and well worth the visual upgrade. Even with maxed-out path tracing settings and DLSS enabled, performance holds up around 50–60 fps, and enabling frame generation bumps that to a smoother 75–80 fps.

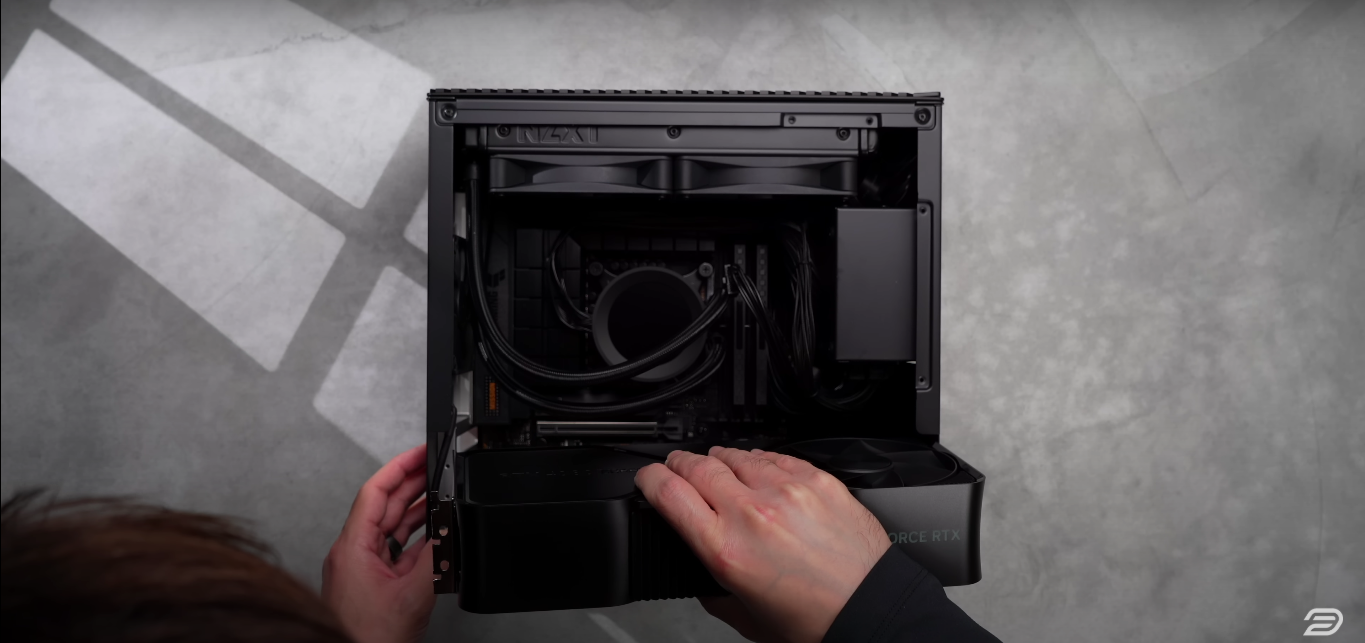
Physically, the 4080 Super is nearly identical to the original. It still uses the blow-through style cooler and the compact Founders Edition design, now fully blacked out. It’s small enough to fit in cases that can be carried in a backpack, making it ideal for LAN parties or travel setups.

CPU: Intel Core i5-13600K

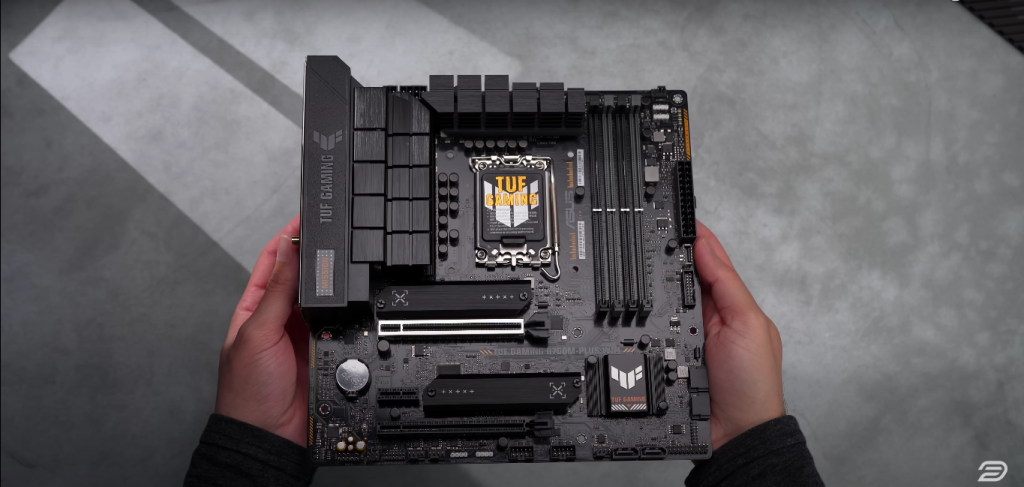
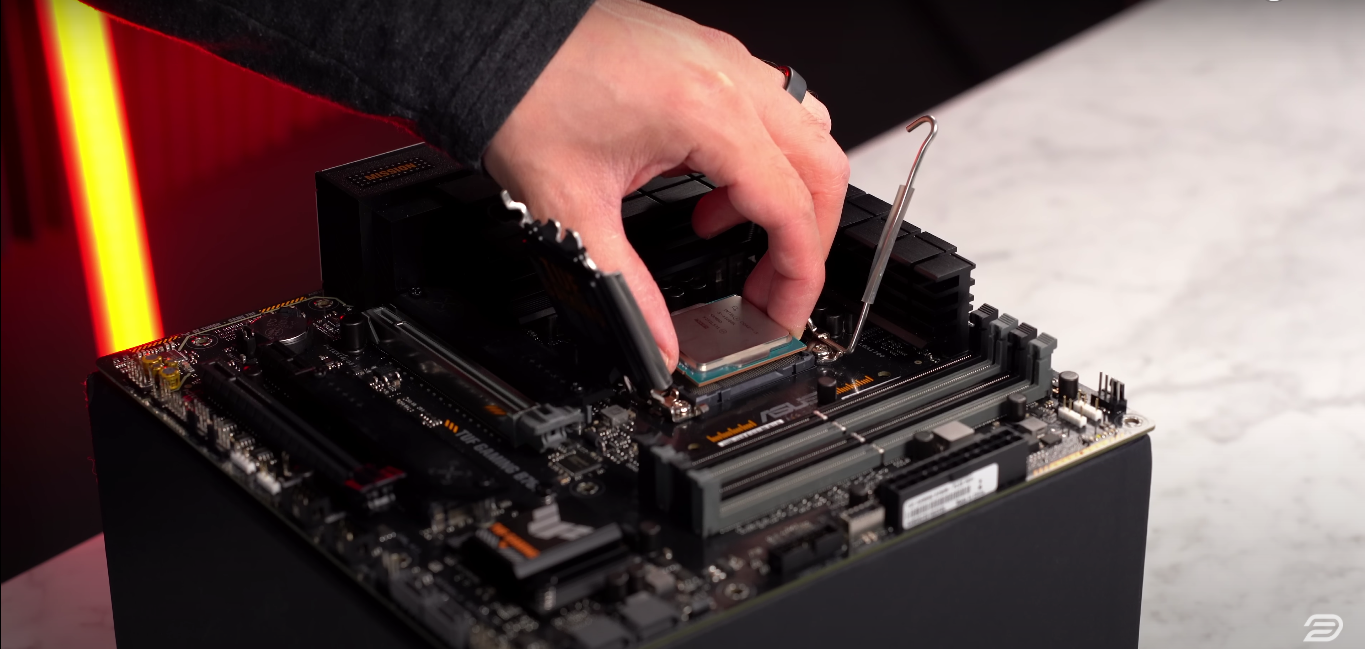
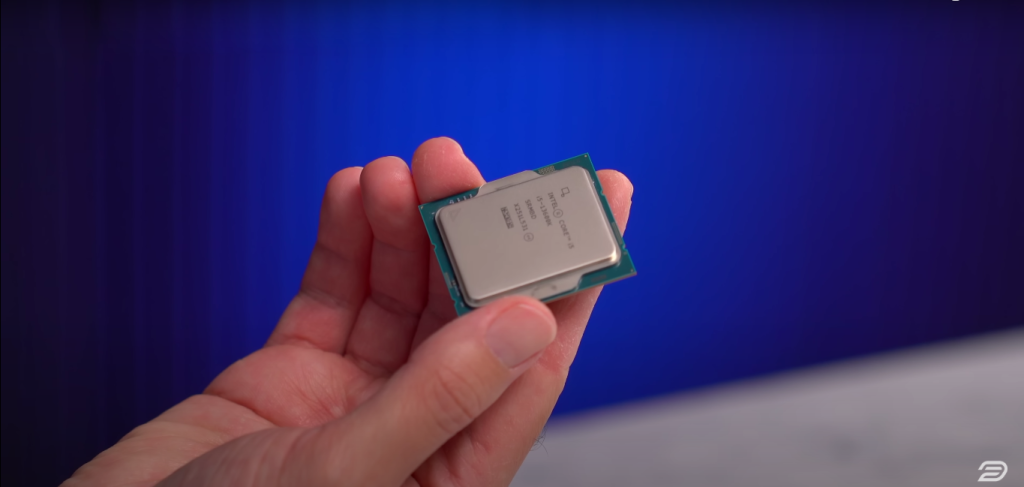
I’m going to be using the i5-13600K, which has 14 cores—six of which are performance cores—and it can boost up to 5.1 GHz. This is still one of the better options available, especially on the Intel side. While the AMD 7800X3D is technically the fastest gaming CPU at the moment, the gains over the 13600K are negligible in most titles, particularly at 4K, which is our target here. The newer 14th-gen 14600K is also available and isn’t much more expensive, but the performance difference between the two is minimal. I don’t see any reason to upgrade when the 13600K is still more than fast enough for today’s GPUs.

CPU Cooler: NZXT Kraken Elite 240

At the top of the case, there’s room for a 240mm radiator, so I installed the NZXT Kraken 240 Elite—one of my favorite coolers right now. It offers solid cooling performance, is easy to set up, and I opted for the version without RGB fans to reduce cable clutter. It uses a single cable to connect the pump and fans to power and USB, which keeps things simple. There’s also a bright and clear 2.3-inch LCD display on the pump head that can show temperatures, images, or other custom content. It’s positioned so we’ll be able to see it clearly through the glass side panel.

Motherboard: Asus TUF GAMING B760M-PLUS WIFI

For the motherboard, I’m using the ASUS TUF B760M. It’s a B-series board, which makes it more affordable than Z-series options, though it doesn’t support overclocking. For my needs, that’s fine—I’m happy with the i5-13600K’s stock performance. There’s also a DDR4 version of this board if you want to save a bit on RAM. It has everything needed for a gaming build, including large VRM heatsinks, plenty of fan headers, a Thunderbolt/USB 4 header, built-in Wi-Fi 6, and a good selection of rear I/O. It strikes a solid balance between features and price for a microATX build.

Memory: Corsair Dominator Platinum RGB 64 GB

For memory, I’m using a DDR5-5600 kit from Corsair. It’s not the absolute fastest available, but it’s more than enough for this build. It supports an XMP profile for easy overclocking, which helps squeeze out extra performance without much hassle. As for storage, the case includes a drive cage that can hold a few hard drives if needed, though specific SSD details weren’t mentioned in the build overview. Given the context, it’s safe to assume there’s at least one M.2 NVMe SSD installed on the motherboard, which is standard for modern gaming setups.

Power Supply: Corsair SF750 (2024)

For the power supply, I’m using the Corsair SF750—one of the best SFX units available. Since the case doesn’t support standard ATX power supplies, this compact and high-quality option is a perfect fit. The case includes a cover that mounts directly to the PSU before installation, helping to keep the interior clean and visually tidy.

Fans: Noctua NF-A12x15 PWM chromax.black.swap

As for fans, there’s space for two 120mm fans at the bottom of the case. I originally planned to use standard fans but swapped them out for slim Noctua fans to avoid clearance issues with the GPU. There’s also room for a single 92mm fan at the rear, which I installed as well. These fans help compensate for the case’s limited ventilation by ensuring solid airflow from the bottom and back.

Step-by-Step Assembly

Step 1

Prep the Motherboard

  • Install the CPU: Insert the Intel i5-13600K into the motherboard socket, aligning the notches and securing the retention arm.
  • Install the Memory: Insert the DDR5-5600 Corsair RAM modules into the appropriate DIMM slots until they click into place.
  • Install Storage: Mount an M.2 SSD onto the motherboard if not already installed.
Prep the Motherboard

Step 2

Install Fans

  • Slide off the Z-18’s single-piece 4mm aluminum outer cover from the top. Set it aside.
  • Install Rear Fan: Mount the 92mm exhaust fan at the rear of the case.
  • Install Bottom Fans (Slim): Attach two slim Noctua 120mm fans to the bottom intake mounts to avoid clearance issues with the GPU.
Install Fans

Step 3

Install the Motherboard

  • Mount the Motherboard: Secure the ASUS TUF B760M board into the case’s standoffs using the appropriate screws.
  • Connect Case Cables: Begin attaching front panel headers, USB, and fan connectors as needed.
Install the Motherboard

Step 4

Install the CPU Cooler

  • Mount the Radiator: Install the NZXT Kraken 240 Elite’s radiator to the top of the case.
  • Mount the Pump Block: Attach the pump to the CPU using the provided mounting hardware and thermal paste.
  • Connect the Pump & Fans: Use the single NZXT cable to connect the pump and radiator fans to power and USB headers.
Install the CPU Cooler

Step 5

Install the Power Supply

  • Prep the PSU Cover: Attach the included PSU cover to the Corsair SF750.
  • Install PSU: Mount the PSU to the front of the case, routing cables as needed for power delivery.
  • Connect Power Cables: Plug in the 24-pin motherboard cable, CPU EPS cable, and PCIe power cables.
Install the Power Supply

Step 6

Install the Graphics Card

  • Insert the GPU: Slot the RTX 4080 Super Founders Edition into the PCIe x16 slot.
  • Secure the GPU: Use case screws to hold the GPU in place.
  • Attach Power Bridge: Use the Corsair 12VHPWR high-power bridge to connect the GPU to the PSU.
  • Check Clearance: Make sure the GPU fits within the 328mm length and 158mm height limit, ensuring the case cover can still be replaced.
Install the Graphics Card

Step 7

Finalize Assembly

  • Tidy Up Cables: Route and zip-tie cables to minimize clutter and maximize airflow.
  • Double Check Connections: Verify all power and data cables are securely connected.
  • Reinstall Case Cover: Slide the outer aluminum cover back into place.
Finalize Assembly

Overall, the RTX 4080 Super provides a significant performance boost over previous generations, now at a more attractive price. It targets users with older 2000 or 3000 series GPUs, offering a substantial upgrade in gaming performance and exclusive features like frame generation. Whether an upgrade is necessary depends on individual needs, but for a high refresh rate for 4K gaming, the 4080 Super is a compelling option.

Contact Us.

If you see an issue, have a suggestion or want a case or component added. Send us a message!