Building a Mini-ITX PC in the Jonsbo T6: Full Guide and Impressions

Watch Video

Small Form Factor PC Build in the Jonsbo T6

I recently got my hands on the Jonsbo T6, and after spending a few days building in it, I’ve got a lot of thoughts to share. This isn’t your typical ITX case — and neither is the hardware I used. Let’s dive into each of the components I picked, and then I’ll walk you through the full build process step by step.

Components

CPU: AMD Ryzen 7 9800X3D


This is AMD’s flagship gaming CPU right now — and yeah, it lives up to the hype. If your main priority is gaming, this is the best chip you can get today. It’s fully overclockable, runs cool, and even sees some productivity gains over the last gen. It doesn’t quite match Intel in single-threaded tasks or AMD’s own 7950X3D in multi-core workloads, but theres always the 9950X3D for that.

Motherboard: ASUS ROG Strix X870-I GAMING WiFi

Now this board is stacked. You’ve got dual USB4 ports at 40Gbps, built-in Wi-Fi 7, and support for both PCIe Gen 5 and Gen 4 NVMe drives. The integrated I/O shield and thick VRM heatsinks make it look premium, and there’s even a rear heatshield. I do wish they had added a third M.2 slot on the back like Gigabyte’s B650I AORUS, but otherwise, this board is fantastic.

The only big downside? No HD audio header. ASUS wants you to use their external Hive audio device instead. It’s a nice little module and adds some convenience, but I still find it frustrating that I can’t plug in my case’s headphone jack directly into the case with this board — especially on a board this expensive.

Memory: Corsair Vengeance 32 GB


I went with 32GB of Corsair Vengeance DDR5-6000, low-profile to avoid clearance issues with the cooler. For storage, I slotted in a 2TB Samsung NVMe SSD — nothing too flashy, just fast and reliable. Since the CPU cooler overhangs the RAM slots, the low-height modules were necessary here.

CPU Cooler: Noctua NH-D12L

The D12L is my go-to for a case with this much CPU cooler clearance. It’s a 120mm-class air cooler that comes in just under 145mm. That makes it compatible with cases like the Jonsbo T6, which officially supports up to 159mm for AMD. I did try to squeeze in Noctua’s bigger D15 G2 (168 mm) just for fun… yeah, it didn’t fit.

Installation is straightforward: add thermal paste, drop the cooler down onto the CPU, and secure it. Just remember to plug the fan in before tightening it down — otherwise, it becomes a bit of a reach.

Graphics Card: ZOTAC SOLO

Originally, I tried installing a rare single-fan 4070 from Zypher… only to discover it was DOA. Total loss. So I pivoted to a Zotac RTX 4060, which does fit the case’s GPU constraints. While not a high-end card, it’s enough for 1440p gaming at decent settings, especially when paired with this overkill CPU.

Power Supply: Corsair RM850e (2025)

The T6 supports ATX PSUs up to 140mm, so I used the Corsair RM750e — one of the few that fit perfectly. Just a heads-up: if your PSU is too long, it’ll block the cable grommets. Route all your cables before mounting the PSU, and you’ll be good to go.

Step-by-Step Assembly

Step 1

Prepare the Motherboard

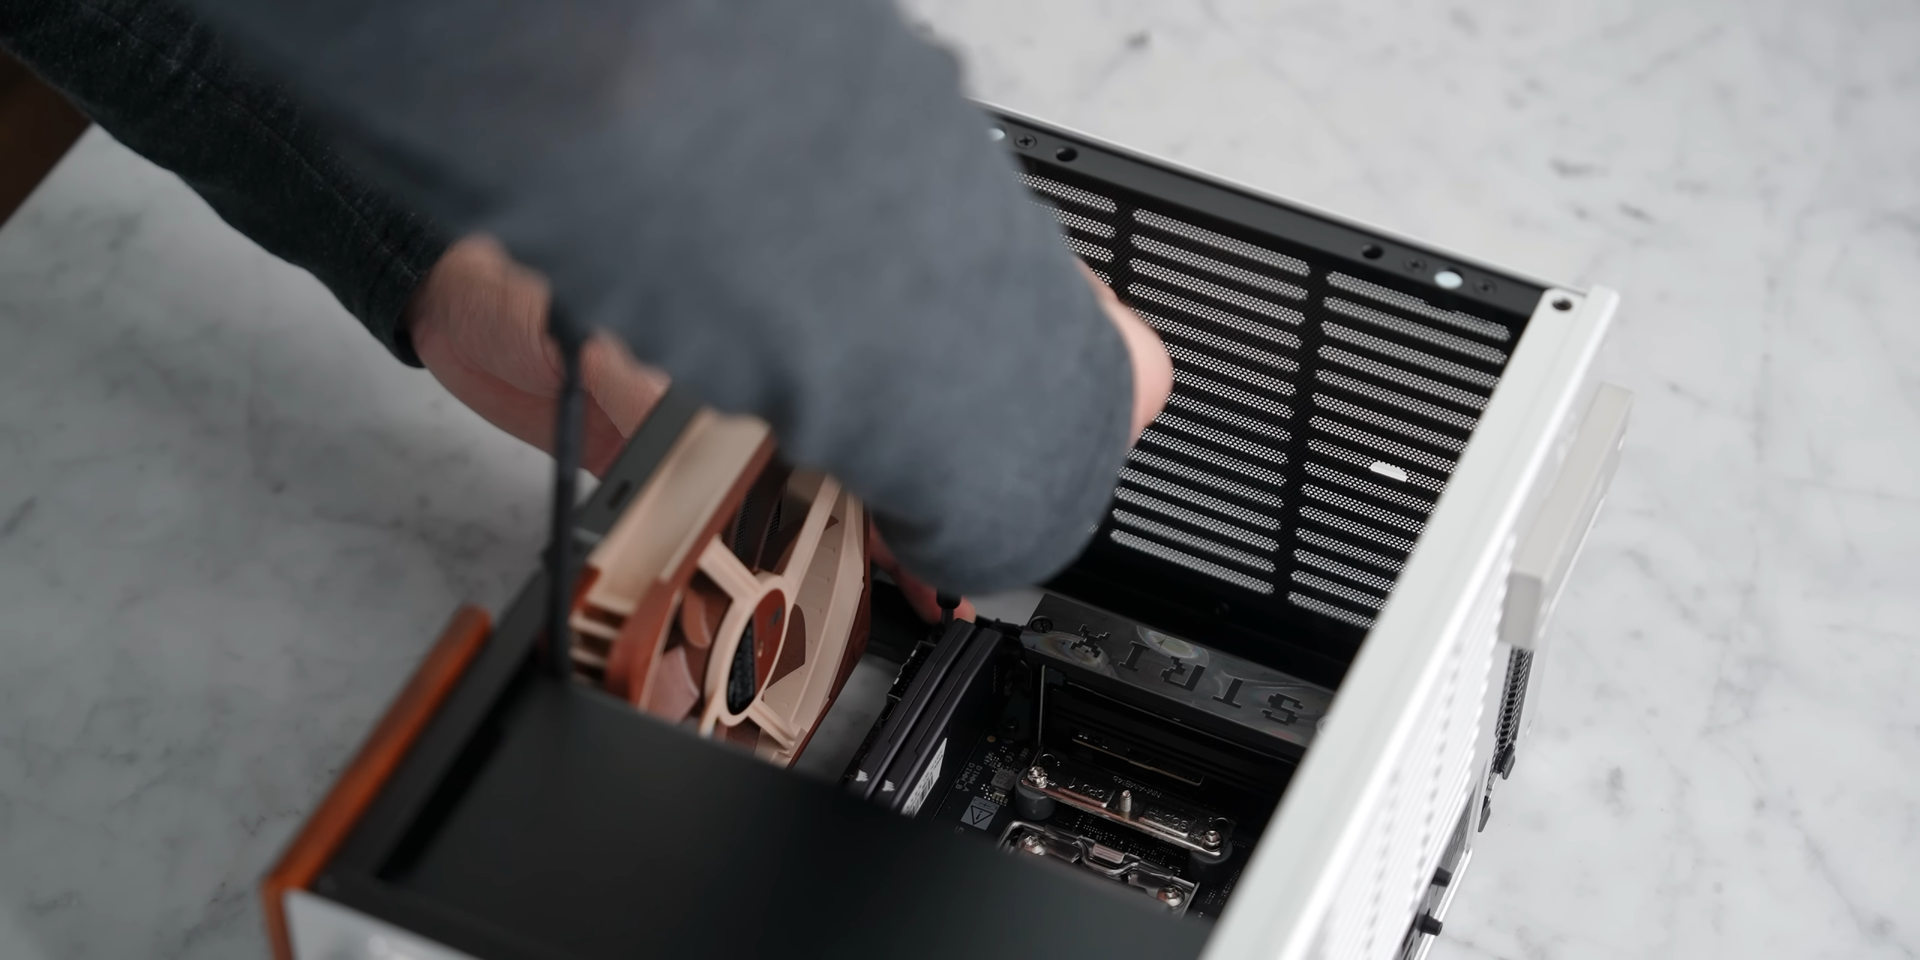
Start by installing your components onto the motherboard before it goes into the case. I’m using the ASUS ROG STRIX X870-I for this build.

  • Install the CPU: Drop the Ryzen 9 9800X3D into the AM5 socket, close the retention arm, and make sure it’s seated properly.

  • Install the RAM: Insert the two sticks of Corsair DDR5-6000 low-profile RAM into the DIMM slots. Since the CPU cooler overhangs this area, low-profile modules are important here.

  • Install the NVMe SSD: Slide the 2TB Samsung SSD into the M.2 slot under the heat sink at the bottom of the board, and secure it with the screw.

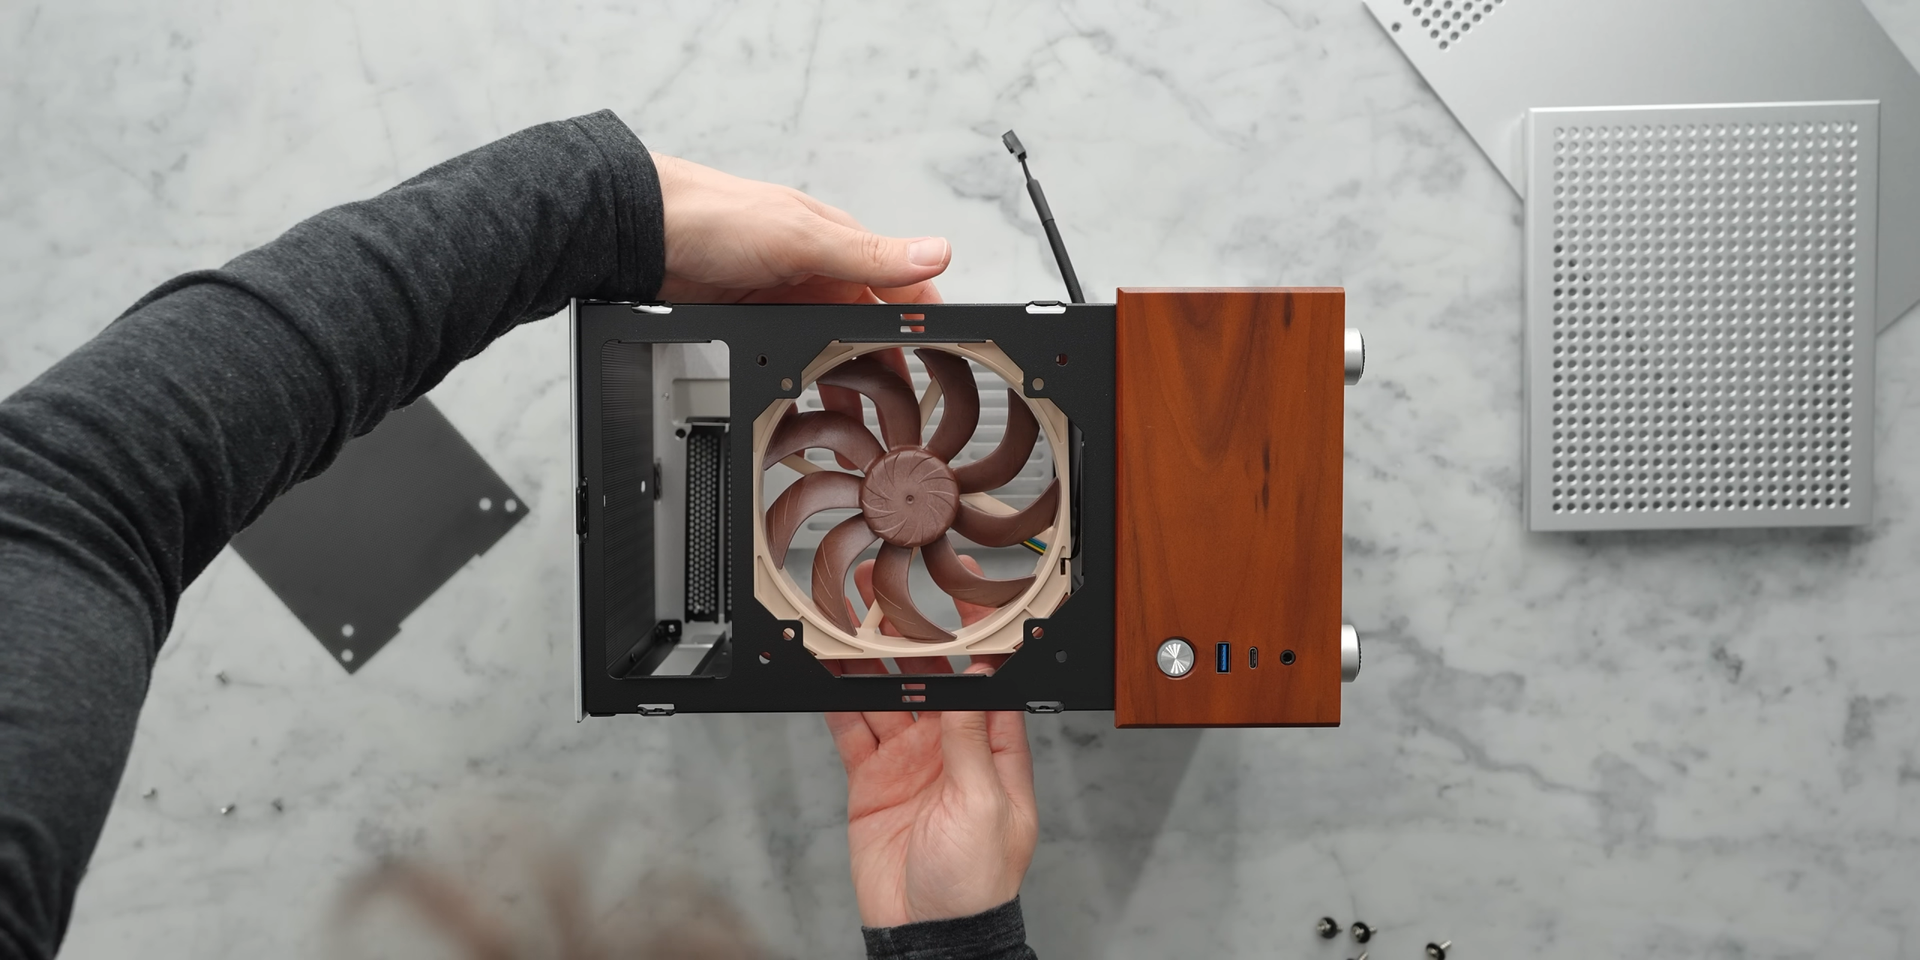
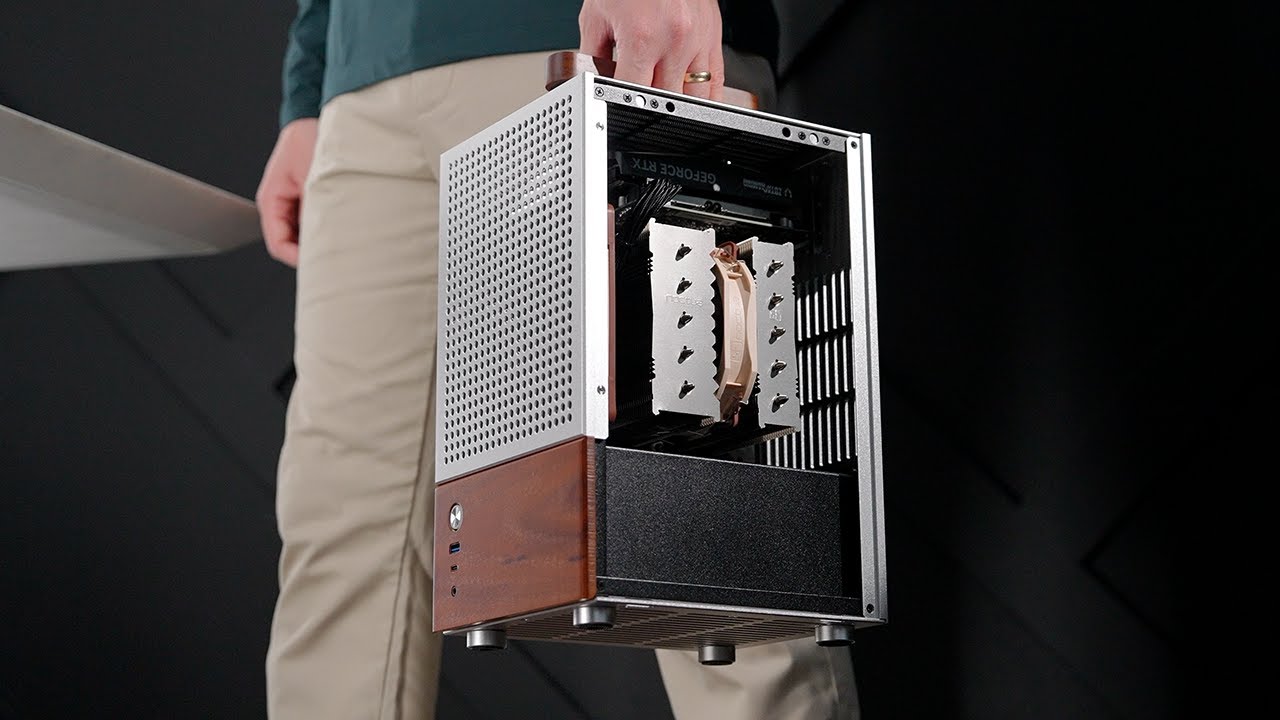
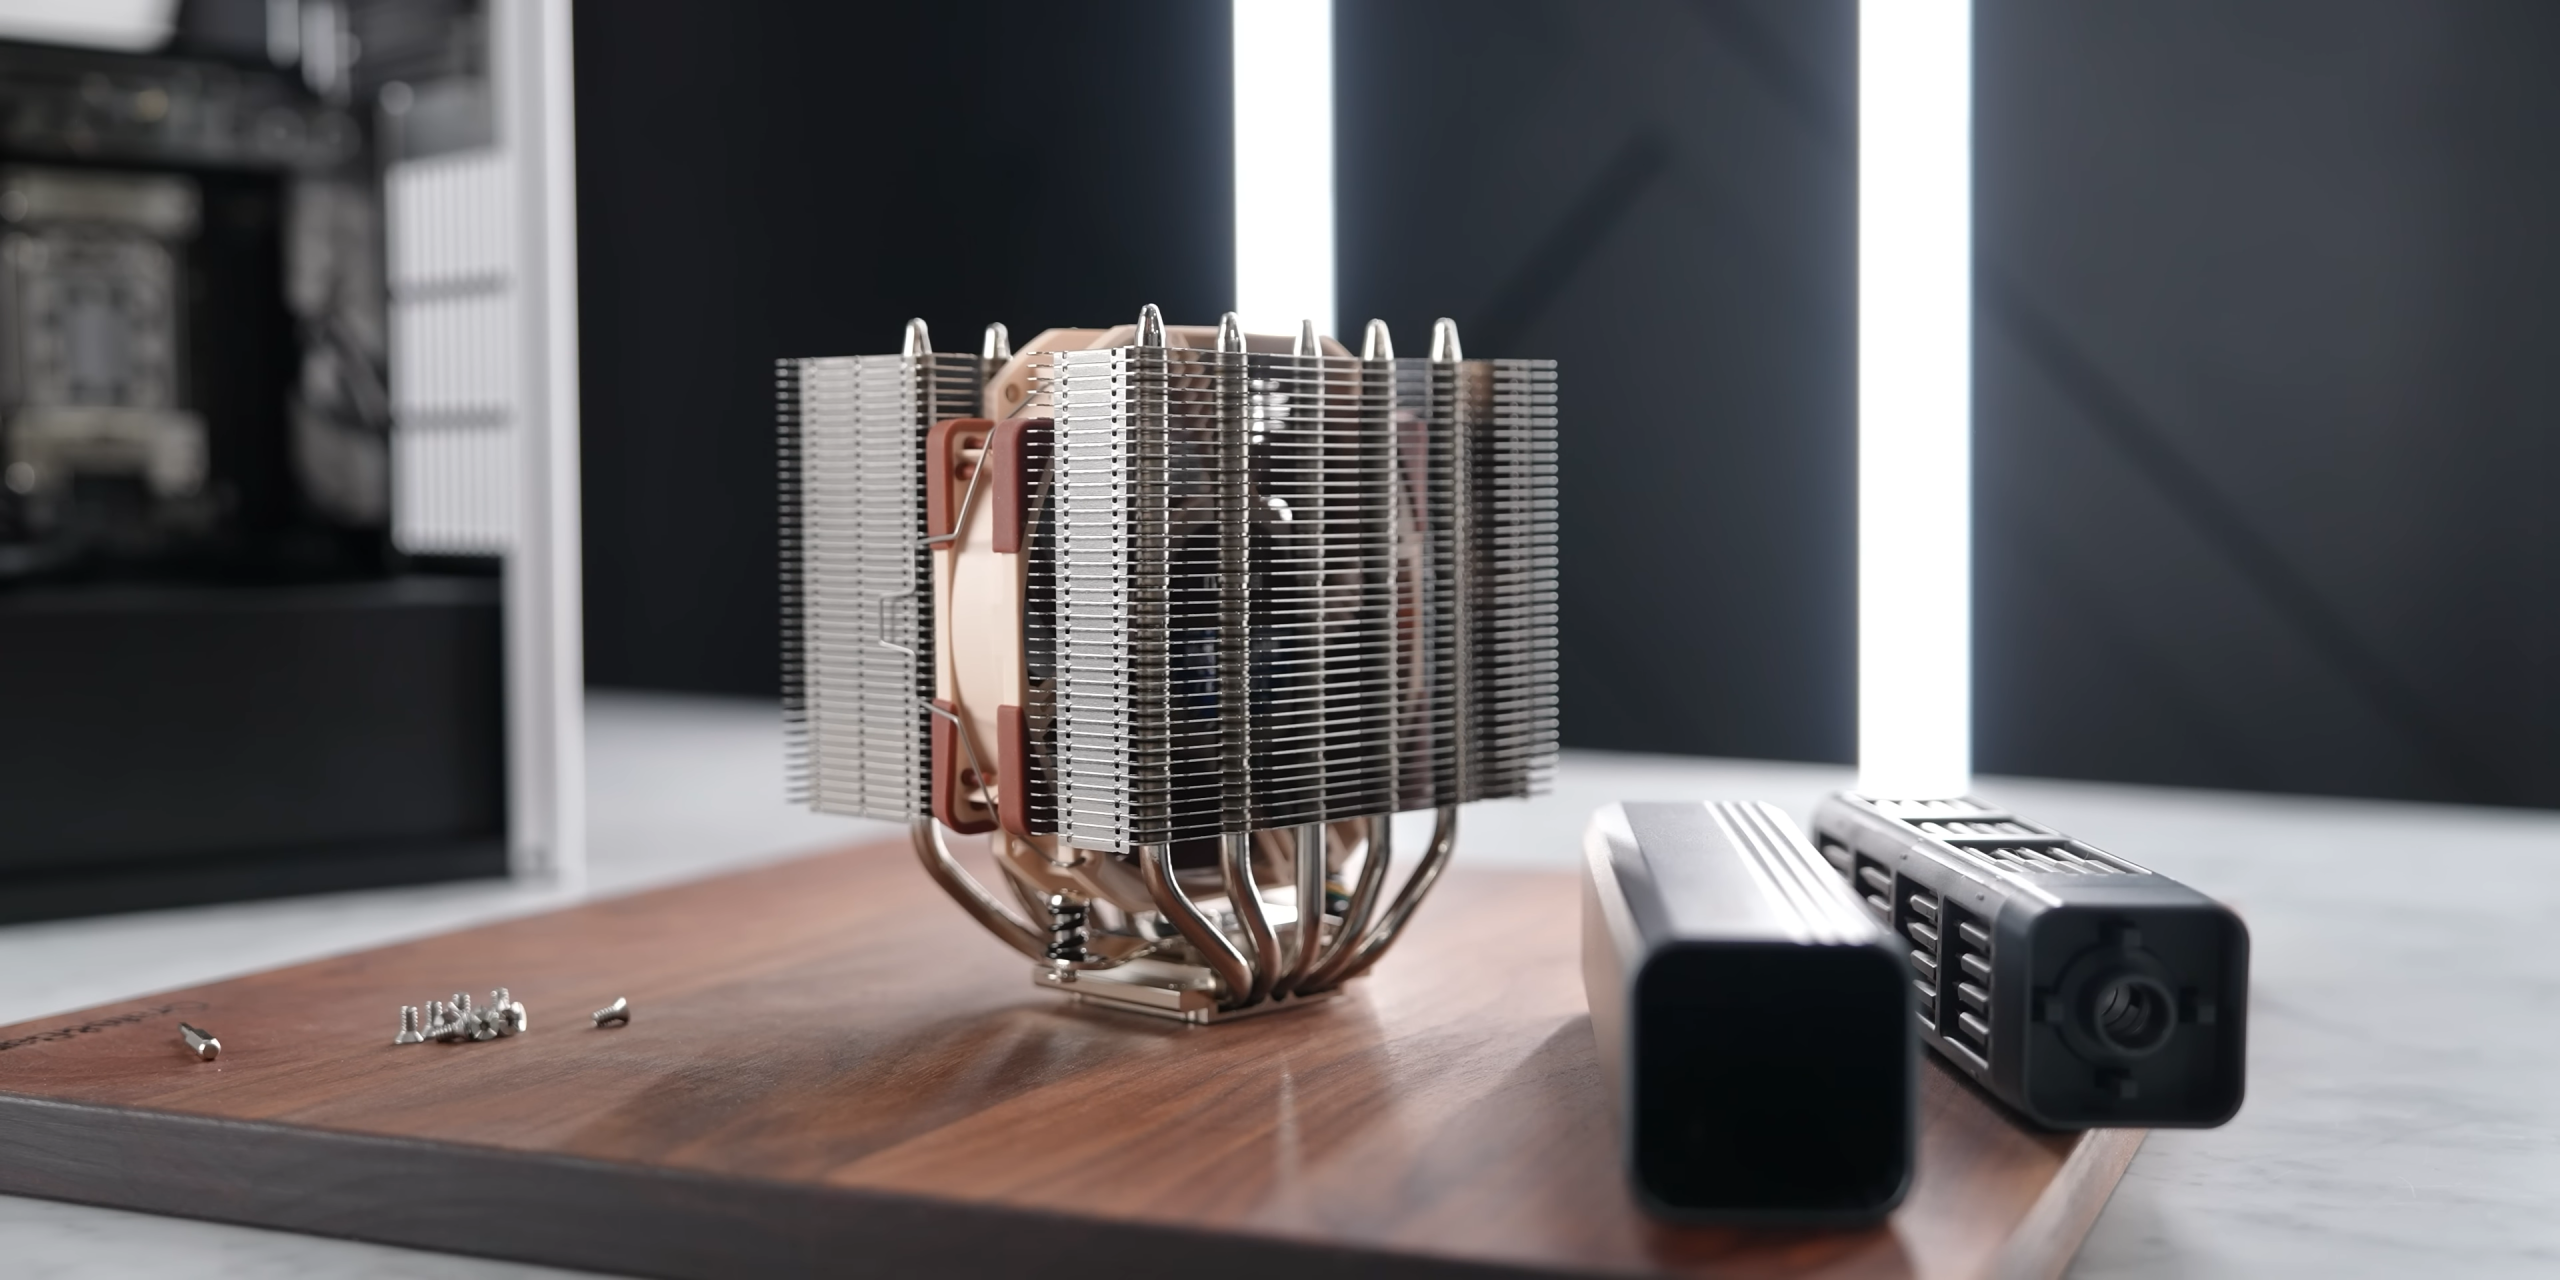
  • Add the Cooler Mounting Hardware: Because I’ll be using the Noctua NH-D12L, I installed the required offset brackets and AM5 spacers now while the board is easily accessible.

Prepare the Motherboard

Step 2

Disassemble the Case

Next, you’ll want to open up the Jonsbo T6 to make installation easier.

  • Remove the Side Panels: Use the included hex driver to unscrew the side panels. They come off cleanly and expose the interior workspace.

 Disassemble the Case

Step 3

Install the Front Intake Fan

Before putting the motherboard in the case, it’s best to get the case airflow sorted.

  • Choose a Fan: I used Noctua’s new A14x25 G2 140mm fan for front intake. It offers improved acoustics and efficiency over previous generations.

  • Mount the Fan: Secure it to the front bracket using the provided screws. If you’re using a 120mm fan instead, the holes are compatible.

  • Attach the Dust Filter: Install the dust filter from the accessory kit in front of the fan to help keep your internals clean.

Install the Front Intake Fan

Step 4

Install the Motherboard into the Case

With the motherboard prepped and the case open, you’re ready to mount the board.

  • Drop It In: Place the motherboard into the standoff mounts inside the main chamber of the T6.

  • Secure It: Use the included screws to attach the board at each standoff point.

  • Note the Layout: This case uses a flipped configuration — meaning the GPU will install at the top of the case, not the bottom.

Install the Motherboard into the Case

Step 5

Install the Power Supply and Route the Cables

Power supplies can be tricky in compact cases, so do this before adding the CPU cooler.

  • Choose the Right PSU: The Jonsbo T6 supports ATX power supplies up to 140mm in length. I used a Corsair RM750e, which fits perfectly.

  • Route Cables First: Before physically installing the PSU, feed your cables through the rubber grommets — particularly the 24-pin, 8-pin CPU, and GPU power cables. One of the grommets gets blocked when the PSU is installed, so do this now.

  • Mount the PSU: Once the cables are in place, slide the PSU into the basement compartment and screw it into place.

  • Connect Cables to the Motherboard: Attach the 24-pin power, CPU power (at the top of the board), front panel connectors, and USB headers now. It’s a tight fit later if the CPU cooler is already installed.

Install the Power Supply and Route the Cables

Step 6

Install the CPU Cooler

Now that the motherboard and PSU are in, it’s time to mount the CPU cooler.

  • Apply Thermal Paste: I used a spread applicator, applying an even layer across the CPU’s heat spreader.

  • Mount the Cooler: With the fan removed from the NH-D12L, lower the heatsink onto the offset brackets and secure it using the included screws.

  • Reconnect the Fan: Don’t forget to plug in the fan header before reattaching the fan — it’s difficult to access once the cooler is fully installed.

Install the CPU Cooler

Step 7

Install the GPU

Even though I originally filmed this with a Zypher single-fan 4070, it turned out to be DOA. So I used a Zotac RTX 4060 instead, which fits perfectly.

  • Remove the Top Panel: Unscrew the top panel to access the GPU chamber.

  • Remove the Rear Bracket: This allows access to the PCIe slot covers.

  • Install the GPU: Slide the GPU into the top PCIe slot and secure it with screws from the back bracket.

  • Reattach the Panels: Once the GPU is in, resecure the rear bracket and top panel.

Install the GPU

Step 8

Final Assembly and Cable Management

You’re almost done — just close everything up.

  • Tuck Away Cables: Pull any loose cables back into the basement. The case’s design makes cable management very straightforward — just route them through the grommets and out of sight.

  • Reattach All Panels: Reinstall the side panels and bottom panel to close up the case.

  • Double-Check Connections: Before powering on, verify all cables (power, front I/O, fan headers, etc.) are seated properly.

Final Assembly and Cable Management

Contact Us.

If you see an issue, have a suggestion or want a case or component added. Send us a message!